Pinewood Derby!
|
Like this page? +1 it on Google Plus! |
It's Pinewood Derby time again & while I don't have any sons of my own, one of the boys at church has asked me to help him again this year. Last year I asked him if he wanted to try to make the coolest car or the fastest car. Last year he picked fastest, but unfortunately we came in 4th place. It did look pretty cool, though & he won a ribbon for that.
This year when I asked the same question, he said he wanted the coolest car - doesn't matter if it comes in last place - it has to be the undisputed coolest car in the pack. Now, being a geek and really just a very big kid myself, I decided there must be at minimum some well-placed LED lights & suggested a rather ambitious project that I have been mulling over since last year - a fully-functioning TRANSFORMER CAR MADE OUT OF WOOD! I mean, what's cooler than that? Seriously! Pictures to follow (soon), race is in less than 2 weeks (hopefully videos then).
The rules are pretty standard cub scout Pinewood Derby rules, the boy should do most of the work (everything safe for him to do), must use the pine block provided (although not exclusively) and the wheels should remain unmodified. No external sources of locomotion (rubberbands, motors, pyrotechnics) and no springs. No problem.
~
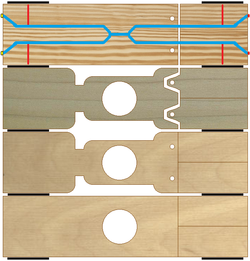
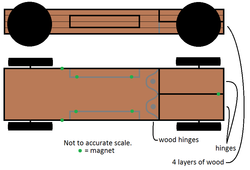
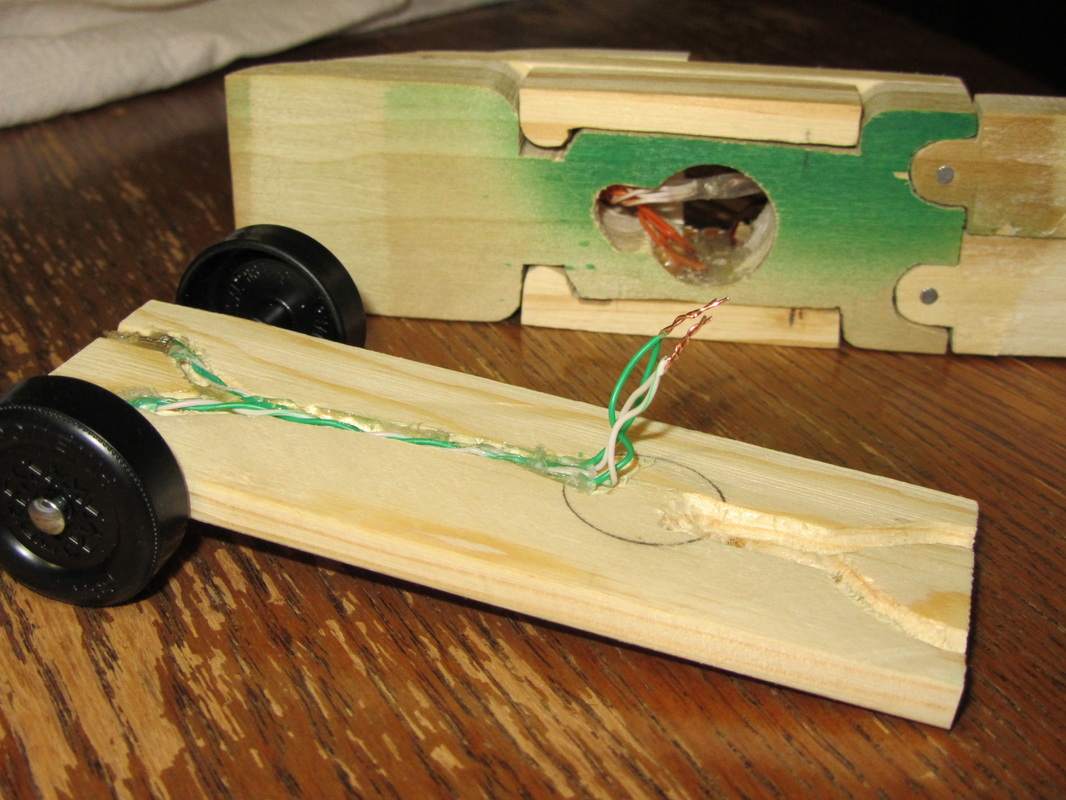
The above picture is the original concept drawing, the left is the final template (upside down, unfortunately, the top shown layer is actually the bottom layer). The basic construction is 4 layers. Bottom layer is 1/4" of the original pine block, next layer is 7/16" poplar and final two layers are 1/4" aspen. Above this will be a canopy made of pine that will finish the overall look of the car.
The only parts I will have to do myself are cutting the original block to 1/4" thick, cutting the other woods to their initial proportions (both of these steps require the tablesaw & there is no way I'm letting a 10-year-old use a tablesaw!) and the wood hinges in the poplar layer (the cut is tricky on the bandsaw & if anyone is losing a finger, it's gonna be me).
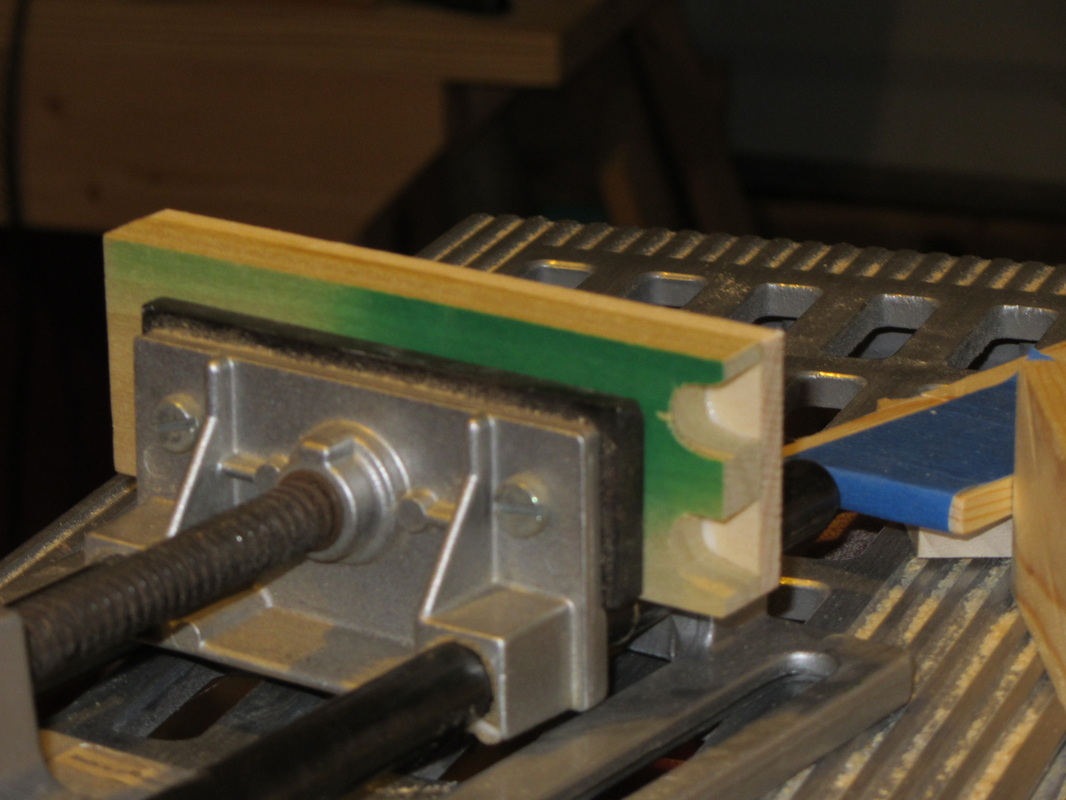
10/13/2011 - Below are the first initial pieces; the first pic is the poplar layer being laminated to the first aspen layer prior to having the doors/arms cut out. The second shot is the canopy (yes, I know it is out of focus - you try to take a picture of something rounded with no contrast in low-light - harder than it looks!).
Notice the cool green paint on the poplar layer. Why is it cool you may ask? Well, you'd only ask if you weren't hip to the (possibly only in Texas) deal at Home Depot where they take imperfect boards and mark them crazy down to get rid of them. They hit them with a little spray paint (which since it is an inside layer I did not bother to sand off) colour-coded to cost. Green is 51 cents. Awesome.
The only parts I will have to do myself are cutting the original block to 1/4" thick, cutting the other woods to their initial proportions (both of these steps require the tablesaw & there is no way I'm letting a 10-year-old use a tablesaw!) and the wood hinges in the poplar layer (the cut is tricky on the bandsaw & if anyone is losing a finger, it's gonna be me).
10/13/2011 - Below are the first initial pieces; the first pic is the poplar layer being laminated to the first aspen layer prior to having the doors/arms cut out. The second shot is the canopy (yes, I know it is out of focus - you try to take a picture of something rounded with no contrast in low-light - harder than it looks!).
Notice the cool green paint on the poplar layer. Why is it cool you may ask? Well, you'd only ask if you weren't hip to the (possibly only in Texas) deal at Home Depot where they take imperfect boards and mark them crazy down to get rid of them. They hit them with a little spray paint (which since it is an inside layer I did not bother to sand off) colour-coded to cost. Green is 51 cents. Awesome.

~
10/15 - The scout cut out the recesses for the arms/doors, I was very impressed how well he used the bandsaw ... he did a better job with it than I first did when I was getting to know the tool just a year ago.
~
10/18 - Had to cancel working on it with the scout on tonight, I accidentally double booked my evening. I did get a couple hours in working on wiring the taillights; the upper legs contain 1 red LED each between the laminated layers. The LEDs are from 3v battery-operated Christmas lights from Ikea (run in parallel). Unfortunately the inexpensive lights have really cheap wiring & while they work fine when left alone, they tend to short out when testing them near not-completely-dried glue. Like when you test them in place while the legs are drying. Little poof of smoke & several hours of work gets to be repeated. Not a good night.
~
10/19 - We have the top layer laminated in place & I bored the electronics cavity, today we decided how to sculpt the front end. The scout got to try out the belt sander (under multiple adult supervision and only in one safe spot). Was very impressed how fast it removed the material & appreciated that I would be finishing the belt-sanding. Too easy to take a finger down to bone on that tool for him to object. We determined the poplar later of the legs was salvageable, so I'll just re-cut the pine. I spent about 90 minutes cutting & sanding some pine for the doors/arms to fit perfectly in the recesses. I was going to have him do them, but most of the shaping happened on the disc sander and as stated above, I want to limit all potential injuries (to him, at least). Tomorrow's plan is to swap out all the cheap wiring with solid core copper (Cat 5e) & we'll get the car wired up. Gotta finish the build by weekend to allow time to paint/dry/test. Fingers crossed!
PS: I'll try to get some in progress pics taken & posted.
PS: I'll try to get some in progress pics taken & posted.
~
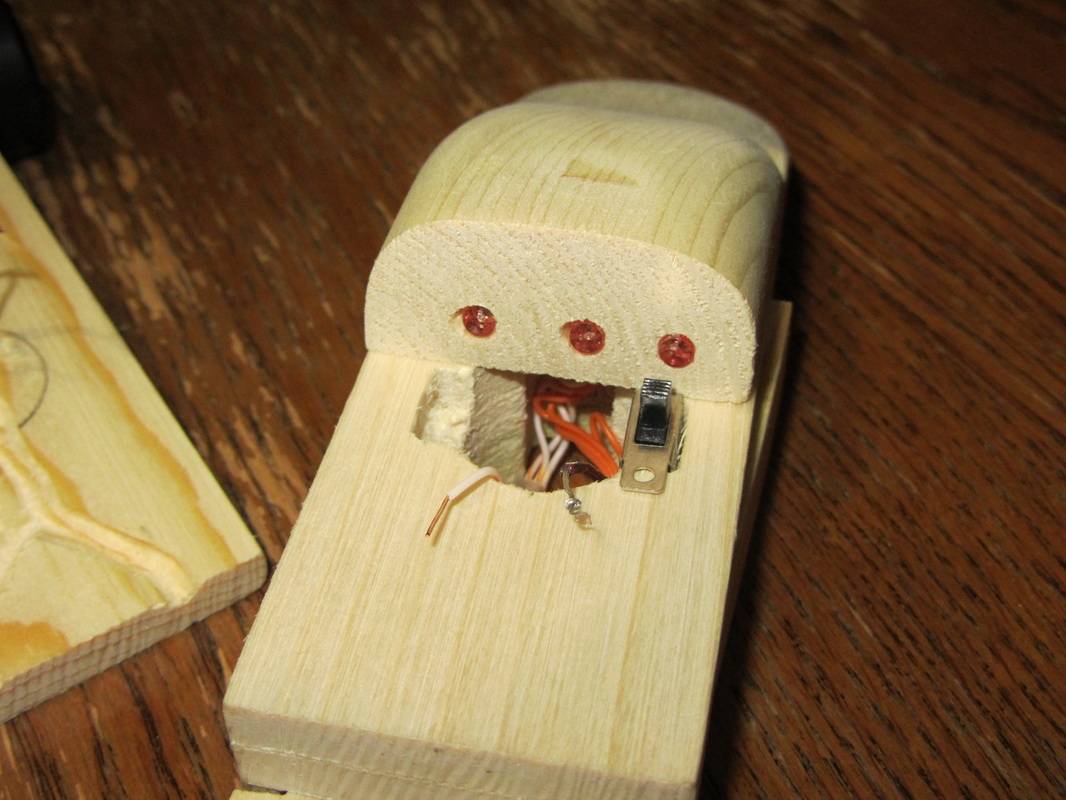
10/20 - Today was productive! My boss helped me wire up the lights & we made a discovery ... two nights ago when I fried the taillights I thought I heard a 'pop' right before seeing the puff of smoke ... turns out it wasn't my fault! (At least, it wasn't the glue being wet that shorted it). While Matt & I were wiring them up, we tested a couple that happened to be red. POP! sounded like a big static charge! Turns out the red bulbs require an unidentified resister (just the reds, not the whites). The jetpack was to have 2 red bulbs & 1 white, but when we (thought we had) finished the wiring & tested, the white wouldn't light up. We then bypassed the switch (and the resister) for the white bulb and still nothing. Either we had 1 bad bulb in the bunch ( I doubt it) or using the resister fried the white one. I'm a little concerned that I won't be able to wire the headlights & taillights to the same switch. I have a lot of testing ahead of me tomorrow ...
So, progress with the scout: We finished attaching the lights & wiring to the jetpack (and tested it - it looks great!) and glued the jetpack/front of the canopy to the car. We then attached magnets to both the arms and the recesses in the car - they work great! We had fun making sparks grinding the rare-earth magnets with the dremel :). As promised, pictures below:
So, progress with the scout: We finished attaching the lights & wiring to the jetpack (and tested it - it looks great!) and glued the jetpack/front of the canopy to the car. We then attached magnets to both the arms and the recesses in the car - they work great! We had fun making sparks grinding the rare-earth magnets with the dremel :). As promised, pictures below:
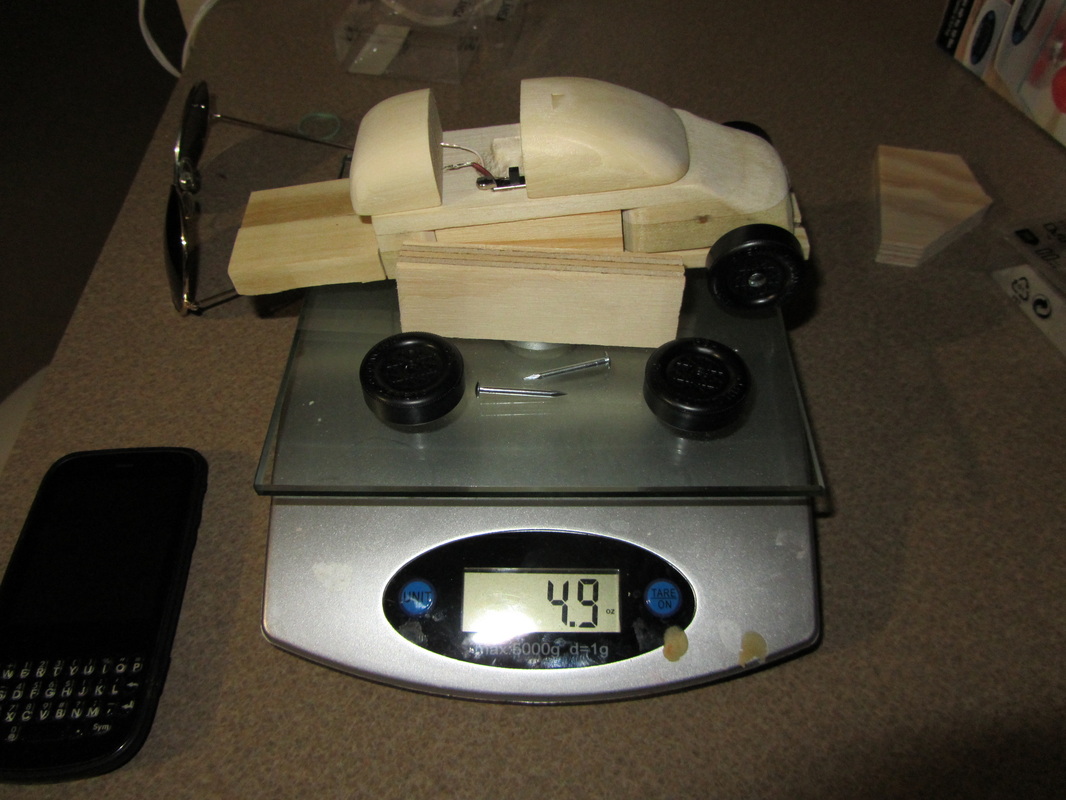
Uh, oh, 5oz is the limit & there aren't any batteries yet ...
I was worried about adding weight, now I have to try to slim it down :(
I was worried about adding weight, now I have to try to slim it down :(
~
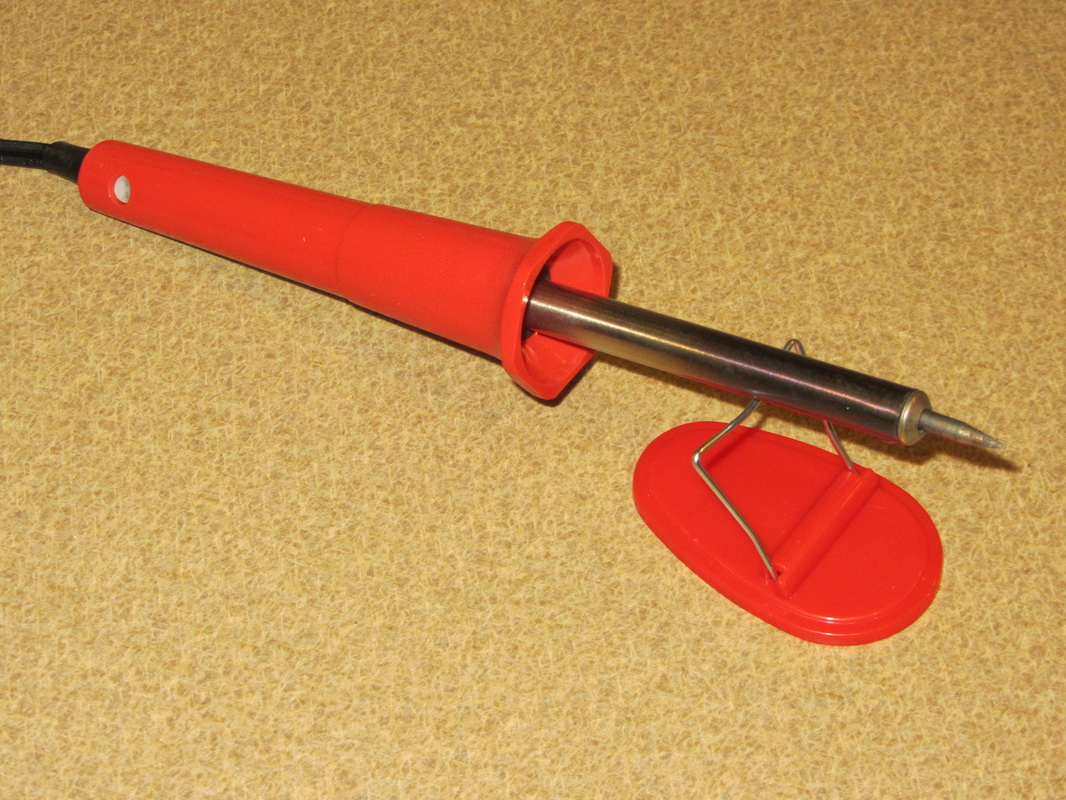
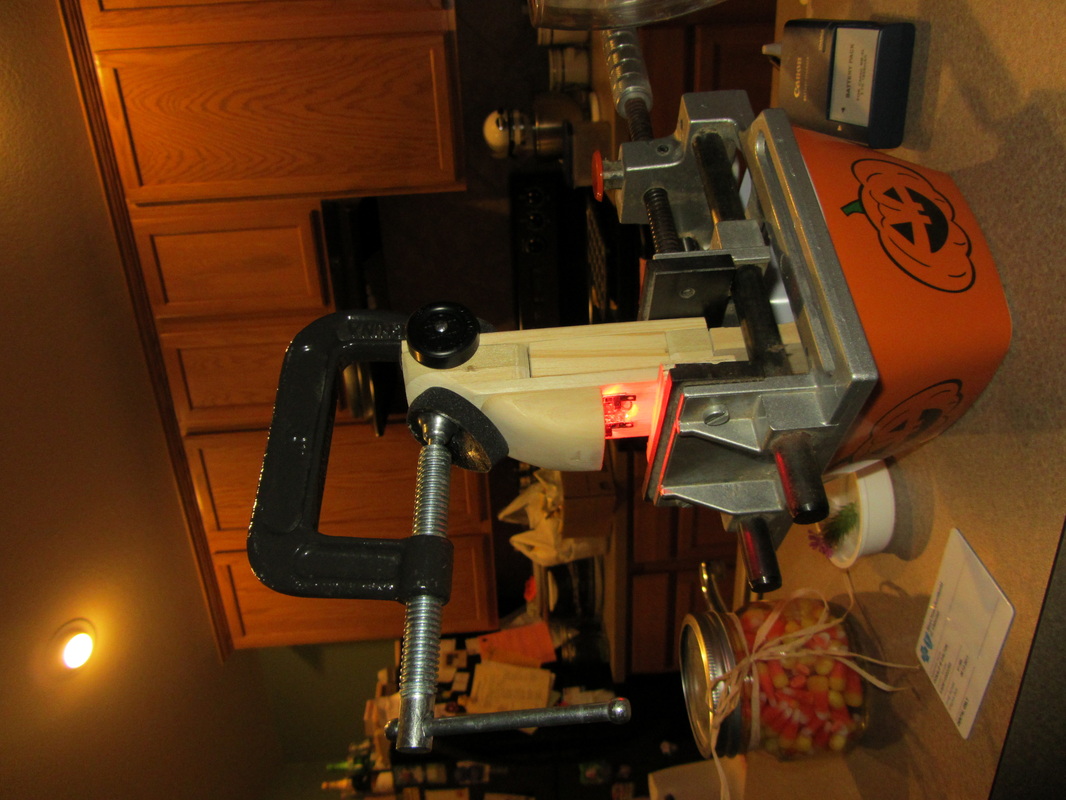
10/21 - Fingers crossed, I drilled some cavities under the hood where no one will see (just in the second & third layers) to shed some weight. I bought a new toy (picture #1 below); my boss was ill & worked from home today, so was unable to help me finish the wiring. Some trial, error & frustration later & I must say, I did a pretty darn good job with the soldering. Took me several times longer than it would have taken Matt, but ... will work fine.
Tests were inconclusive; I was unable to kill another white LED using the resistor but they did flicker a bit on it & when I used both red & white together, only the red would glow. So, I did some really tricky (for me, anyway) wiring to bypass the resistor for the white bulbs & use it for the reds. This *kinda* worked, but for some reason the whites were so dim that in a well lit room you wouldn't even know they were lit at all. I had to make an executive decision that I hope the scout agrees with: If we can't have both headlights & taillights, the headlights are more important; I killed the tail lights altogether. I regret having to make the call, but there is no other way to do it except the have headlights so dim you can only see them in the dark - and still only barely then. I hope he agrees.
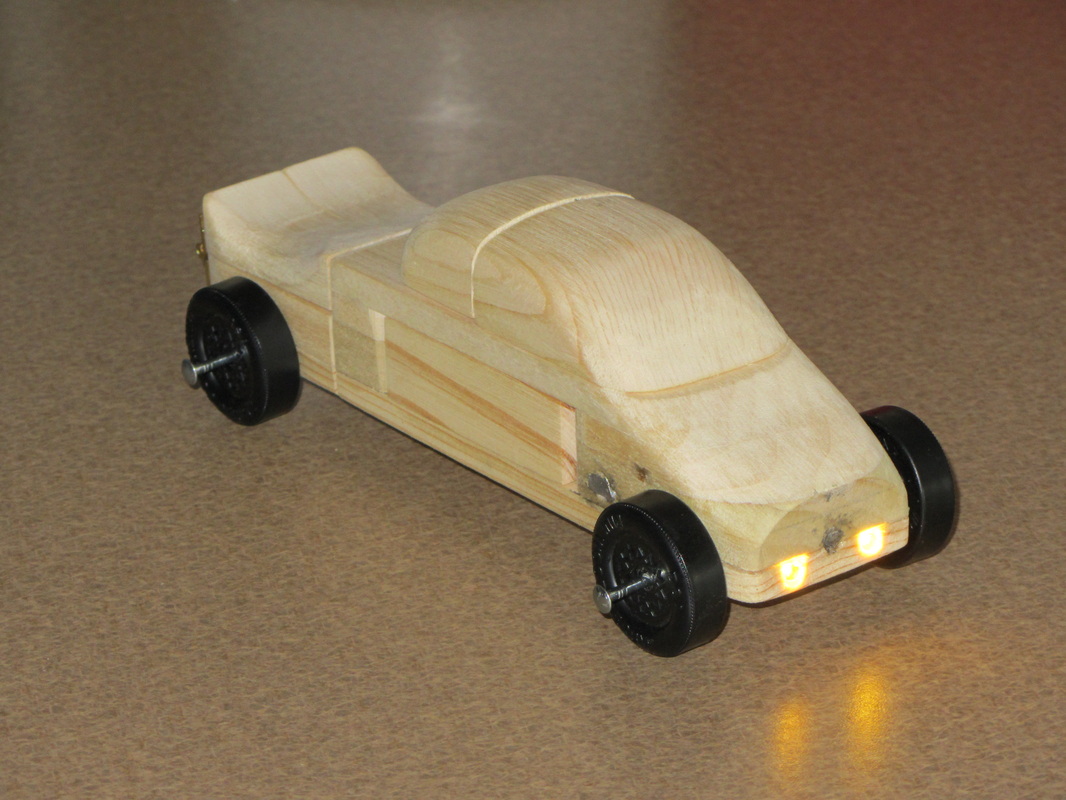
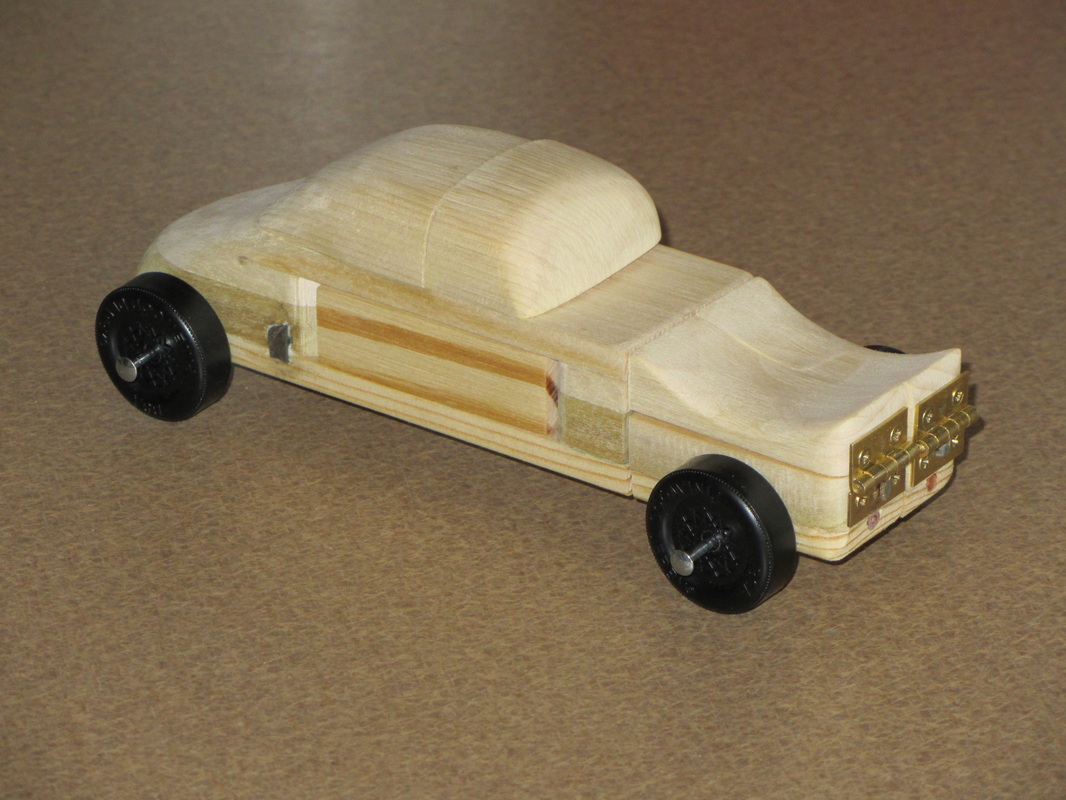
Picture 2 below shows the car clamped, laminating the bottom later to the rest of the car, with the jetpack lights lit. You may be able to see one or both of the switches in the pic. Picture 3 shows the headlights lit. It's not just the picture, the white lights are not quite as bright as the red ones, but we knew this going in. Another minor disappointment is there is no way to change the batteries. The only way to get the wiring to work was to bury them so far that you would have to gut it to get to them. They should easily last the night of the race & hopefully enough time to play with it a bit too. AAs last 60 hours with 10 bulbs, buttons should get a several hours with 2-3 lit at a time. Bummer, as they came in an 8pk & I have no use for the other 6.
Tests were inconclusive; I was unable to kill another white LED using the resistor but they did flicker a bit on it & when I used both red & white together, only the red would glow. So, I did some really tricky (for me, anyway) wiring to bypass the resistor for the white bulbs & use it for the reds. This *kinda* worked, but for some reason the whites were so dim that in a well lit room you wouldn't even know they were lit at all. I had to make an executive decision that I hope the scout agrees with: If we can't have both headlights & taillights, the headlights are more important; I killed the tail lights altogether. I regret having to make the call, but there is no other way to do it except the have headlights so dim you can only see them in the dark - and still only barely then. I hope he agrees.
Picture 2 below shows the car clamped, laminating the bottom later to the rest of the car, with the jetpack lights lit. You may be able to see one or both of the switches in the pic. Picture 3 shows the headlights lit. It's not just the picture, the white lights are not quite as bright as the red ones, but we knew this going in. Another minor disappointment is there is no way to change the batteries. The only way to get the wiring to work was to bury them so far that you would have to gut it to get to them. They should easily last the night of the race & hopefully enough time to play with it a bit too. AAs last 60 hours with 10 bulbs, buttons should get a several hours with 2-3 lit at a time. Bummer, as they came in an 8pk & I have no use for the other 6.

UPDATE: According to my math + data from Wikipedia, these cells should last 13 - 21.25 hours on headlights and 8.5 - 14 hours on jetpack. I have about 30 minutes use in testing + a couple hours the night of the race, he'll still have a bit of time left for play. Awesome!
~
10/22 - Pictures as soon as the final 6 magnets are in place; that + painting is all that is left to do. When I estimated the remaining pieces to be added the other day, I under-estimated the weight of the remaining pieces. By over 0.5 oz. Unfortunately the battery in the scale died before final assembly so I don't know exactly how close we are ... we were several grams over at my last estimate. I've done what I can to lighten it & plan to remove the removable pieces (the ones held with magnets) for the race, but even with that it is too close for comfort. 0.1 oz is enough to be disqualified so while hopeful, very nervous. On a more positive note, all the pieces fit perfectly & it definitely has character. The lights work great & I expect it to have many hours of good quality playtime after the races. I see the scout at about 5:30 tonight, I'll have the magnets installed by then & he'll paint it over the remainder of the weekend. I'll have to tell him to go easy on the paint, we can't afford to add more weight! :)
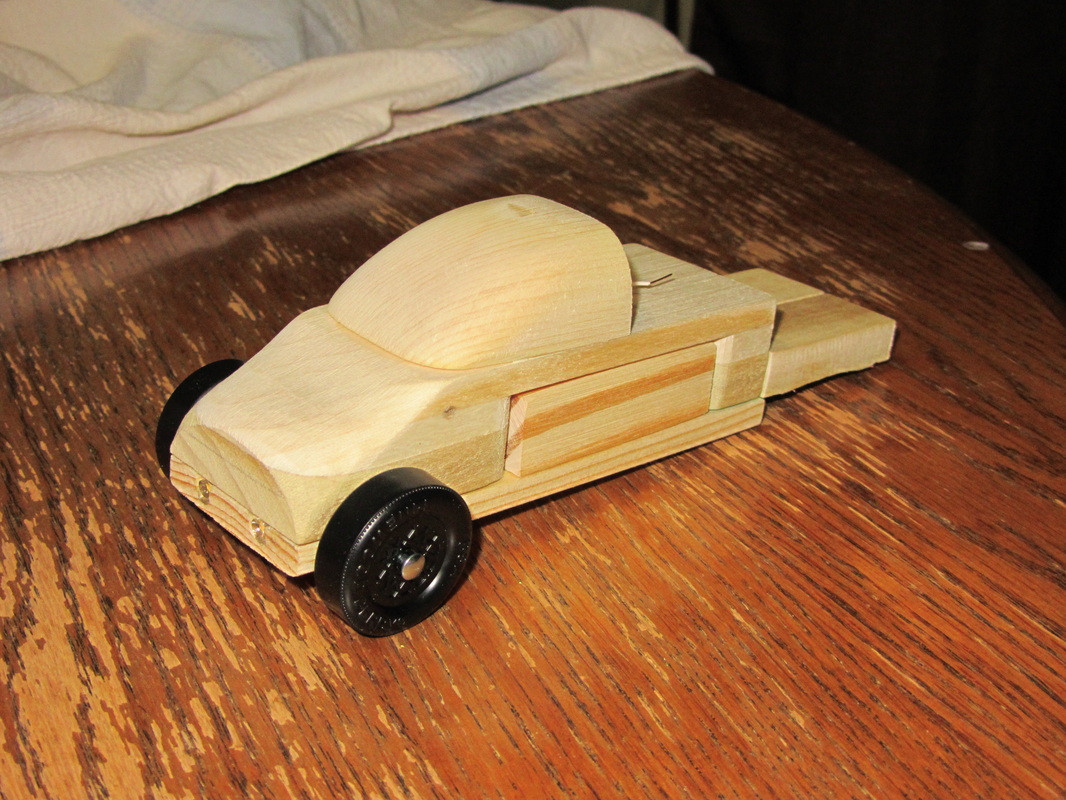
UPDATE: Pictures below; it still needs to be painted so I backed out the nails holding the wheels. I left them in a little so we can get an idea what it will look like done. I'll pull them entirely & clean up the nails on my drill press while the scout paints. Next anticipated update Monday, after the test run!
UPDATE: Pictures below; it still needs to be painted so I backed out the nails holding the wheels. I left them in a little so we can get an idea what it will look like done. I'll pull them entirely & clean up the nails on my drill press while the scout paints. Next anticipated update Monday, after the test run!

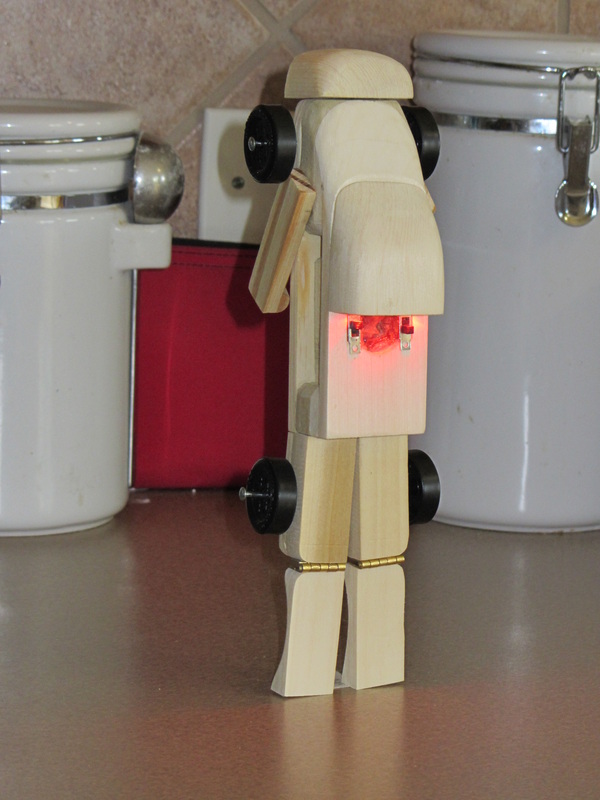
FINAL UPDATE (FOR TODAY): The scout came and picked up his car - he loved the lights & was really impressed that it can stand on its own! I forgot that I loaned out my red & black craft paints to someone that unexpectedly had to leave town, but fortunately I still had a 'tester' jar of bright red house paint. He started to paint it here before taking it home to finish & all I'm gonna say is it looks awesome. By the way, I did a way better job tooling the axles this year. I cranked up the speed on my drill press & used two different grinders, then finished with 600 grit wet-dry with a little machine oil. A baby's backside should be so smooth. Next scheduled update will have completed pics & maybe even a test-run video. Stay tuned!