Burgundy to Purple for under $10
UPDATE: They're done, but more pics still needed.
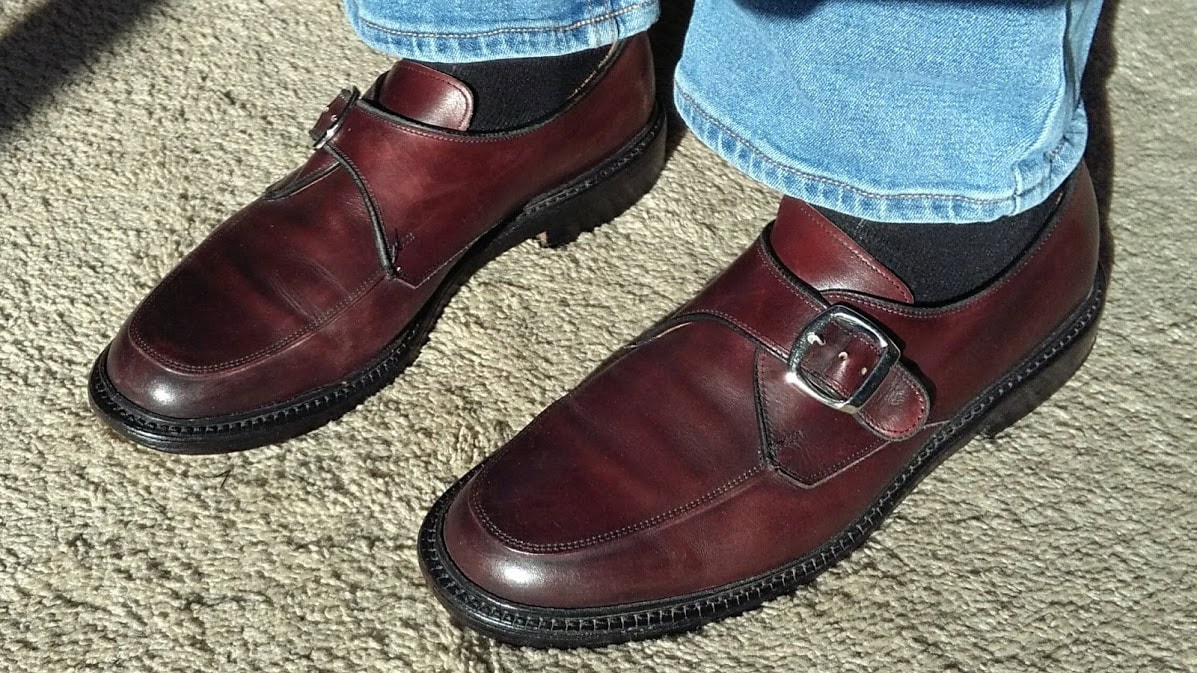
I purchased a pair of used Allen Edmonds Halsteds, a single strap monk in Oxblood. Loafers aren't really my style and I've never liked Oxblood much, but I got a great deal on them ($30 shipped) and they's in quite good shape, so I thought I might try my hand at redying them - something I've read a bit about & am anxious to try.
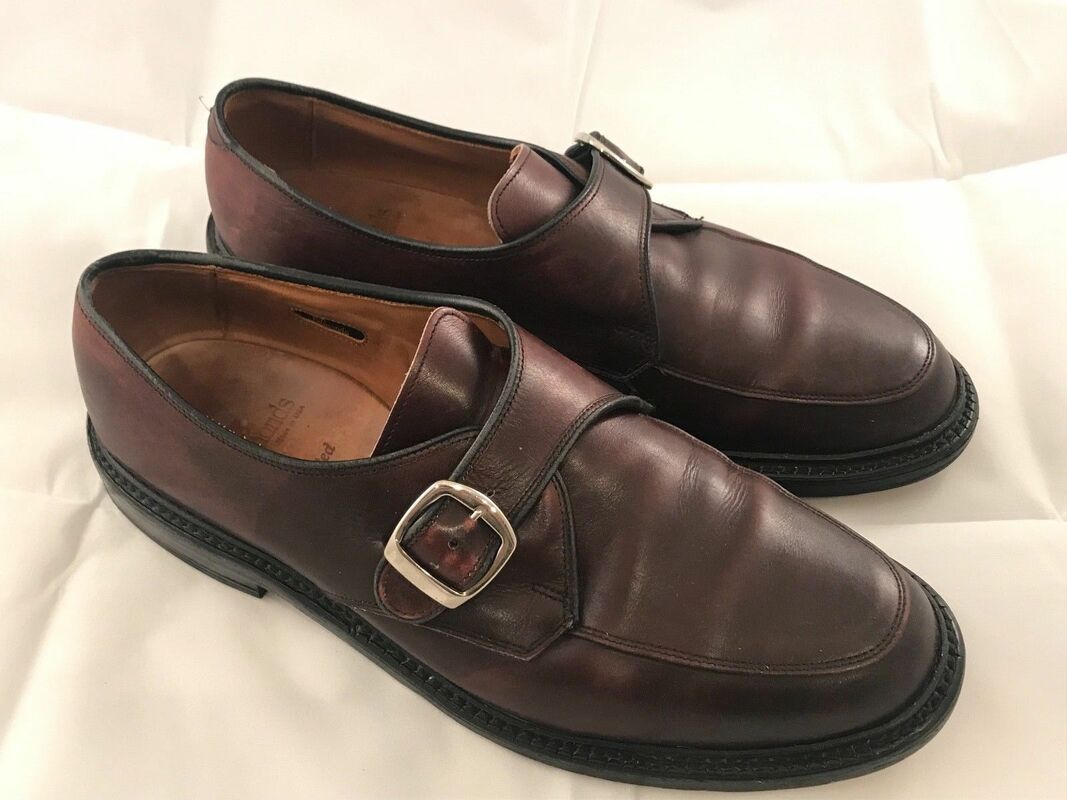
Photo credit: The guy that sold them on eBay.
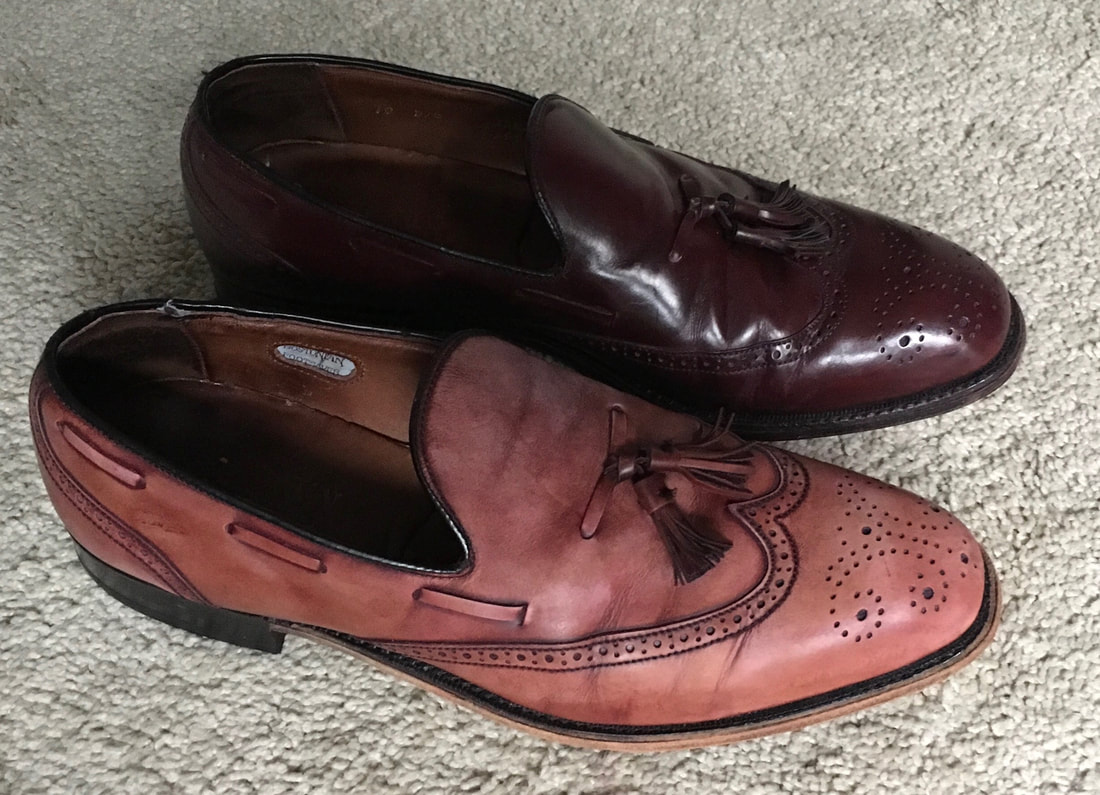
That said, I really don't want to destroy a pair of Allen Edmonds that fit so nice and have so many years left in them (their double leather sole combined with them not being an 'everyday' shoe equals likely decades of life), so I decided to do a trial run first. Enter a sacrificial pair of Bostonian tassel loafers.
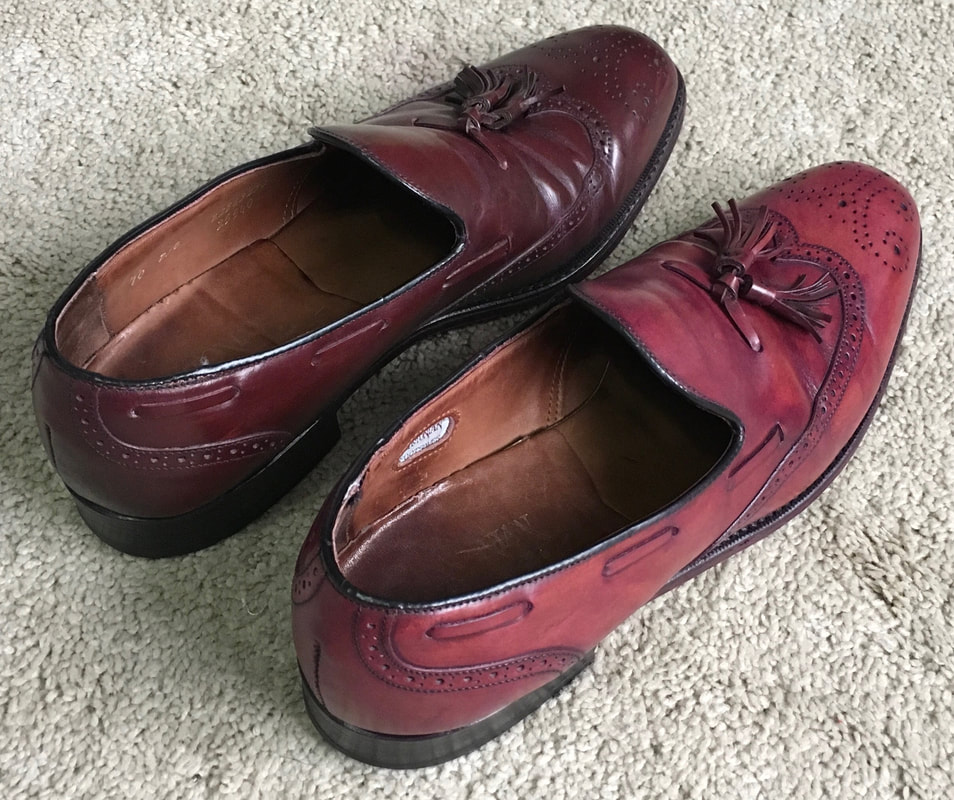
If you're fortunate enough to live near a Deseret Industries, you're doing yourself a disservice if you don't shop there. I bought these for $8, and while you can tell by the below before pictures that they need a little TLC, I could see that they had potential & that their construction appeared to be quite similar to the AEs.
If you're fortunate enough to live near a Deseret Industries, you're doing yourself a disservice if you don't shop there. I bought these for $8, and while you can tell by the below before pictures that they need a little TLC, I could see that they had potential & that their construction appeared to be quite similar to the AEs.
The Internet is full of opinions as to the best way to do this or if it is even possible. Some say you cannot dye shoes lighter than their original dye (not completely wrong, you can't dye lighter than they are when you do it as dye always darkens), some say you should use acetone to strip the old dye while others caution to never use acetone as it destroys the leather.
I can't speak to acetone (I decided I'd rather not subject a pair of AEs to something so harsh), but I read that you can use 100% pure alcohol and that it was far less harsh. 100% pure alcohol pretty much doesn't exist, but you can buy 99.9% pure on Amazon for a pretty reasonable price link, link, but since I was using a sacrificial pair anyway, I decided I didn't have anything to lose to try to use 91%, something you can pick up for a couple bucks at any grocery store in the US link & something I had on hand already.
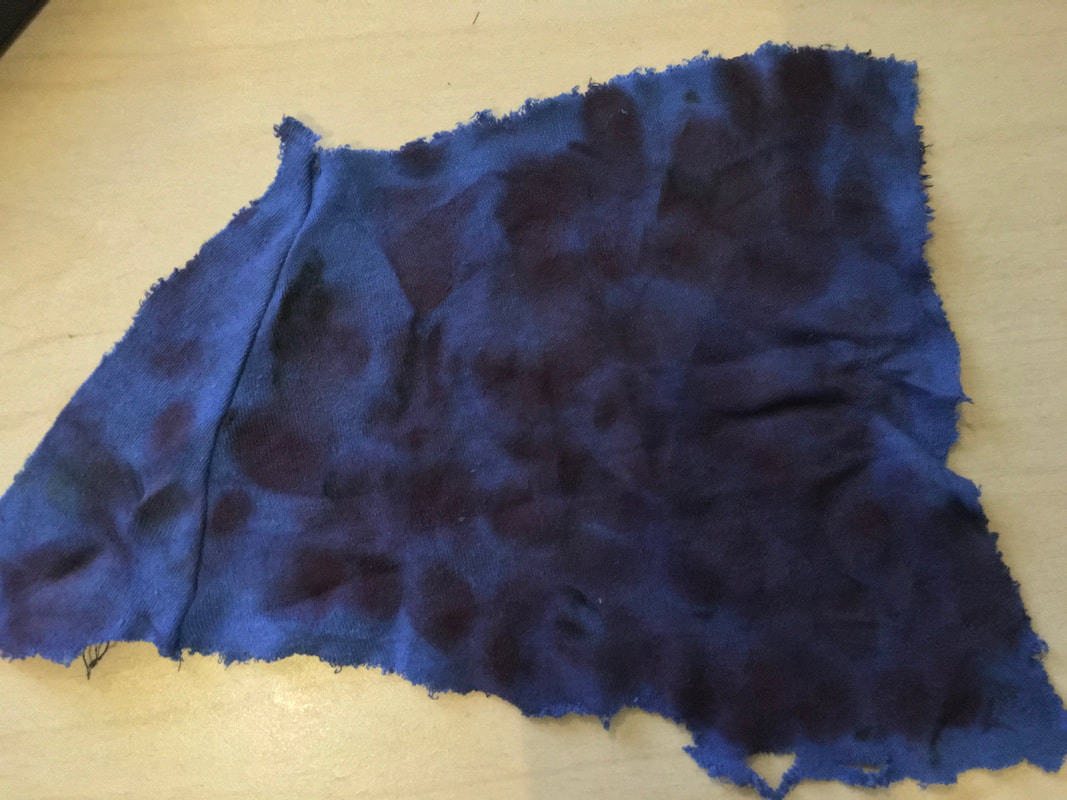
I cut up an old polo into rags (a little thicker than a standard T-shirt - I don't know anything that suggests you couldn't use a T-shirt, but I wanted the sturdier material) and went through a few pieces like the below:
I can't speak to acetone (I decided I'd rather not subject a pair of AEs to something so harsh), but I read that you can use 100% pure alcohol and that it was far less harsh. 100% pure alcohol pretty much doesn't exist, but you can buy 99.9% pure on Amazon for a pretty reasonable price link, link, but since I was using a sacrificial pair anyway, I decided I didn't have anything to lose to try to use 91%, something you can pick up for a couple bucks at any grocery store in the US link & something I had on hand already.
I cut up an old polo into rags (a little thicker than a standard T-shirt - I don't know anything that suggests you couldn't use a T-shirt, but I wanted the sturdier material) and went through a few pieces like the below:
If you're considering starting this yourself, a word of caution: this was a LOT of work! Also, wear gloves (I didn't and yes, I knew better). I did one shoe at a time (as of this writing I have only done one shoe - I'll wear gloves for the next!) and took pictures as I went so you can see the comparisons. I didn't take a proper 'before' picture, but both shoes looked exactly the same when I started (I cleaned and polished the shoes to wear them to work from the above before picture).
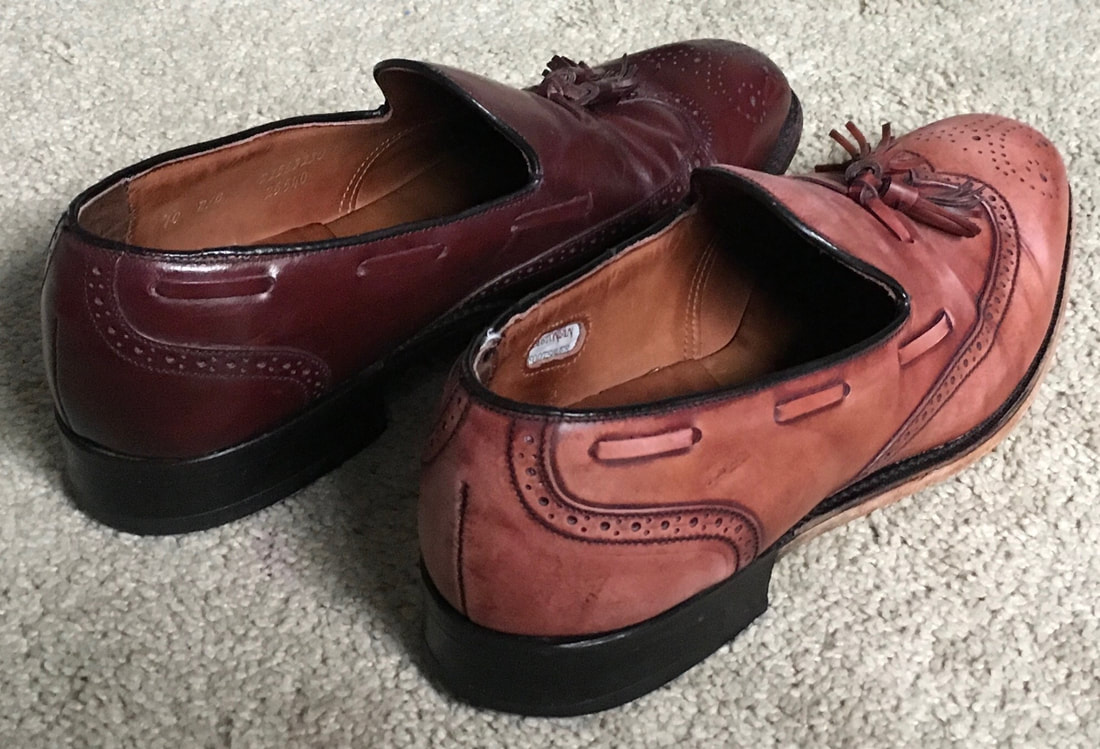
This first set of pictures represents about three hours of scrubbing with one finger (or sometimes thumb) at a time. You'll discover you pretty much have to do it in small sections (might not be the worst idea to use something like saddlesoap first to remove any polish - I should have & will next time) and I found putting the fabric over my finger, then placing my finger over the alcohol bottle (mine has a small opening in the lid) and turning the bottle upside down for a second to dampen the rag worked best. Once the rag was dampened, I quickly worked an area of the shoe until it looked like it wasn't coming off any more (generally the spot on the rag would be quite darkened as well) & then I'd move to a new spot on the rag and repeat. I'd recommend focusing on areas you care most about (like the toe) until it looks like you've gotten as much off as you think you can, then try to make the rest of the shoe look the same.
Don't worry if it looks a little uneven, you'll see below mine did too, but I think it turned out OK.

Next, I rehydrated the leather with Saphir Renovateur (again, something I had on hand, I use this on all my leather shoes - if you don't already have it on hand, you should). Notice the splotches all seem to blend back together into a very nice, if slightly red, light brown:


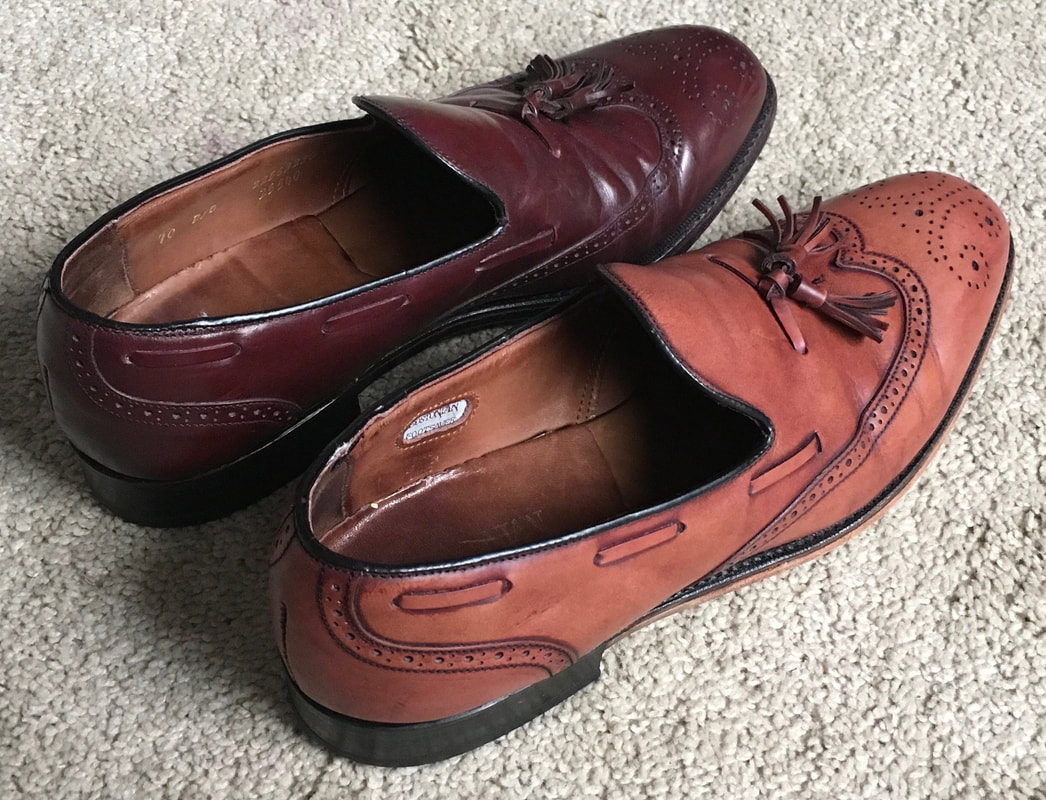
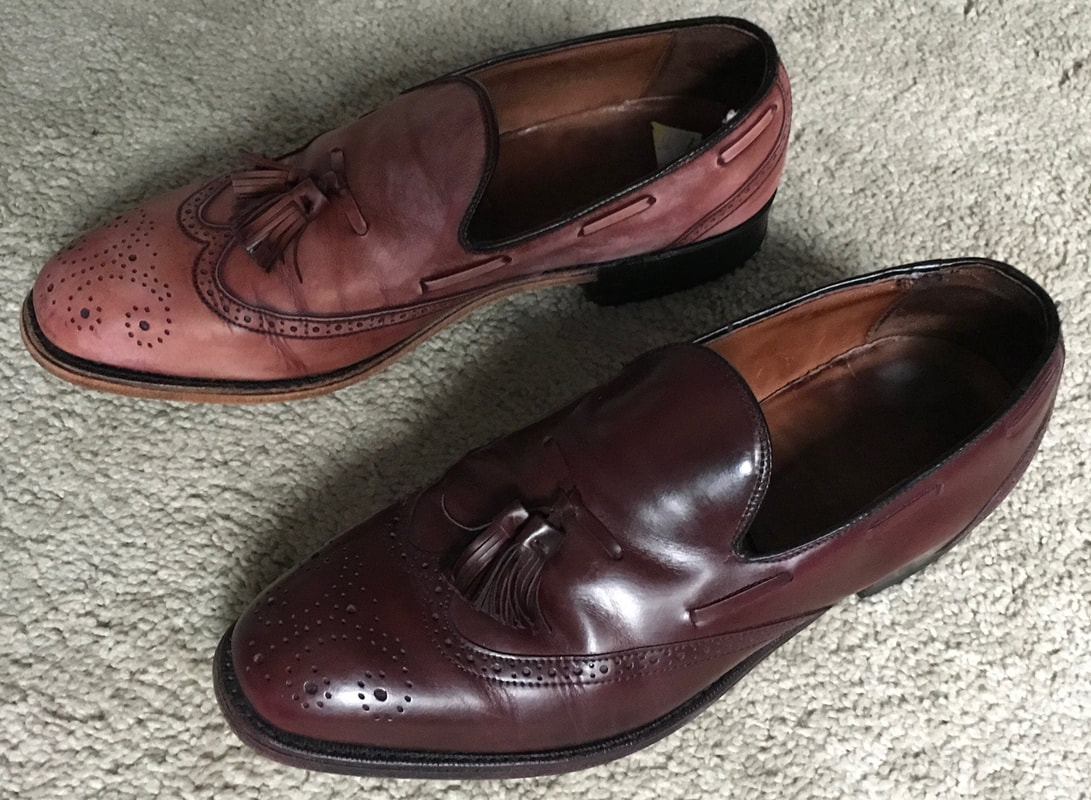
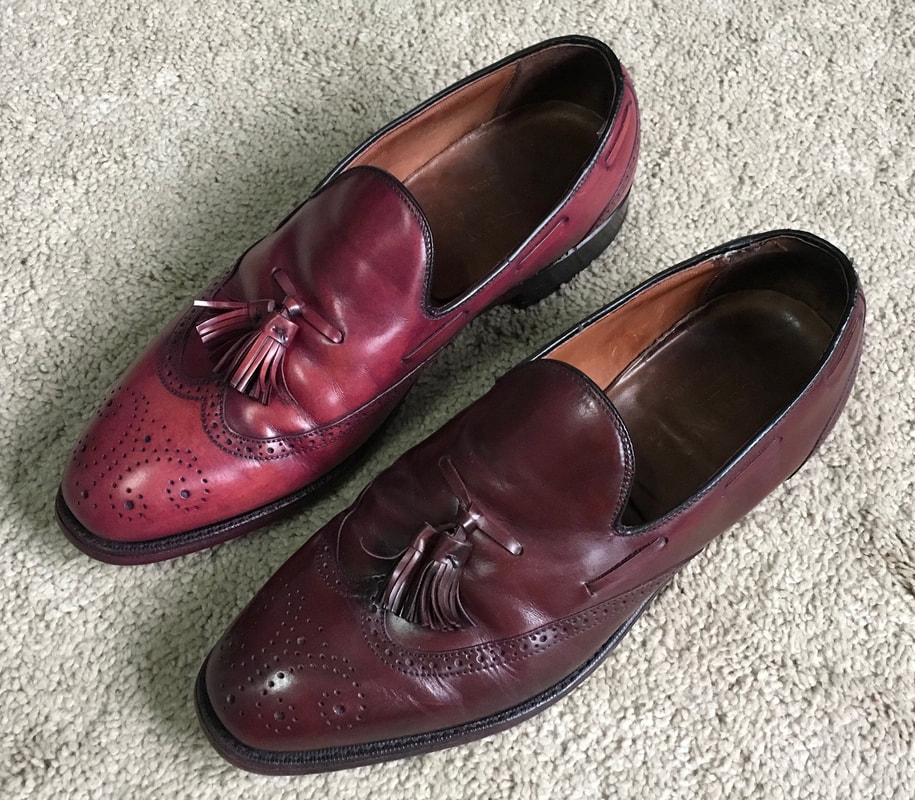
I could have stopped there and used a light or medium brown polish, but since my objective was purple, I used a lavender polish that I bought specifically to do this.
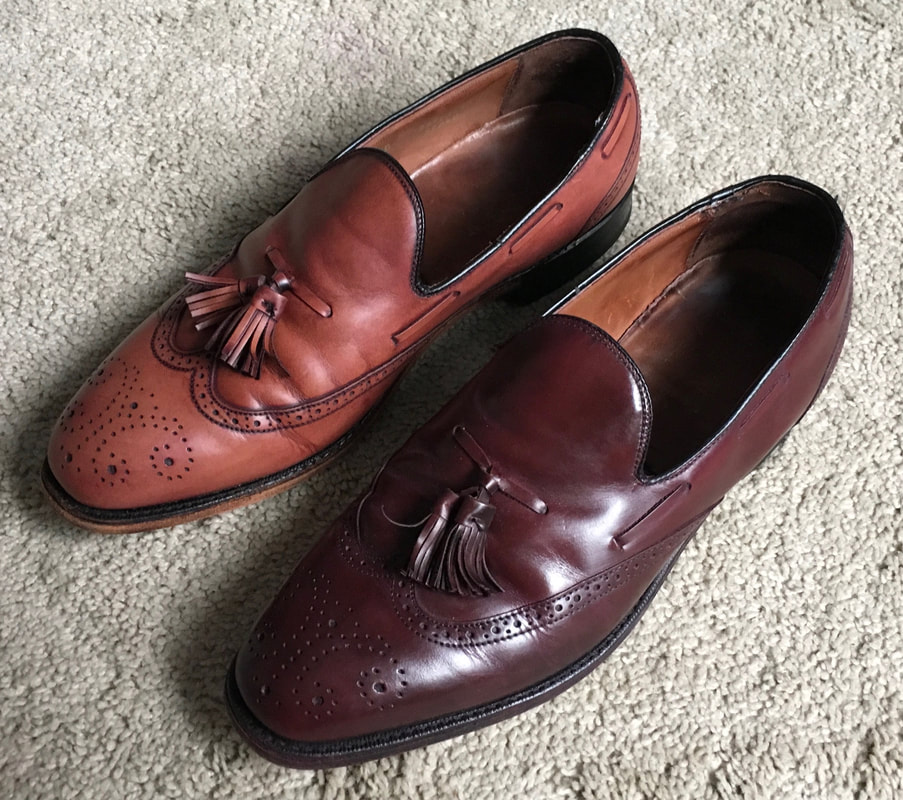
The next set of images represents two very generous applications of the polish, each followed by a rest and then vigorous brushing with a horsehair brush. I then applied a little clear wax polish to just the toes and buffed those with the brush.
The next set of images represents two very generous applications of the polish, each followed by a rest and then vigorous brushing with a horsehair brush. I then applied a little clear wax polish to just the toes and buffed those with the brush.


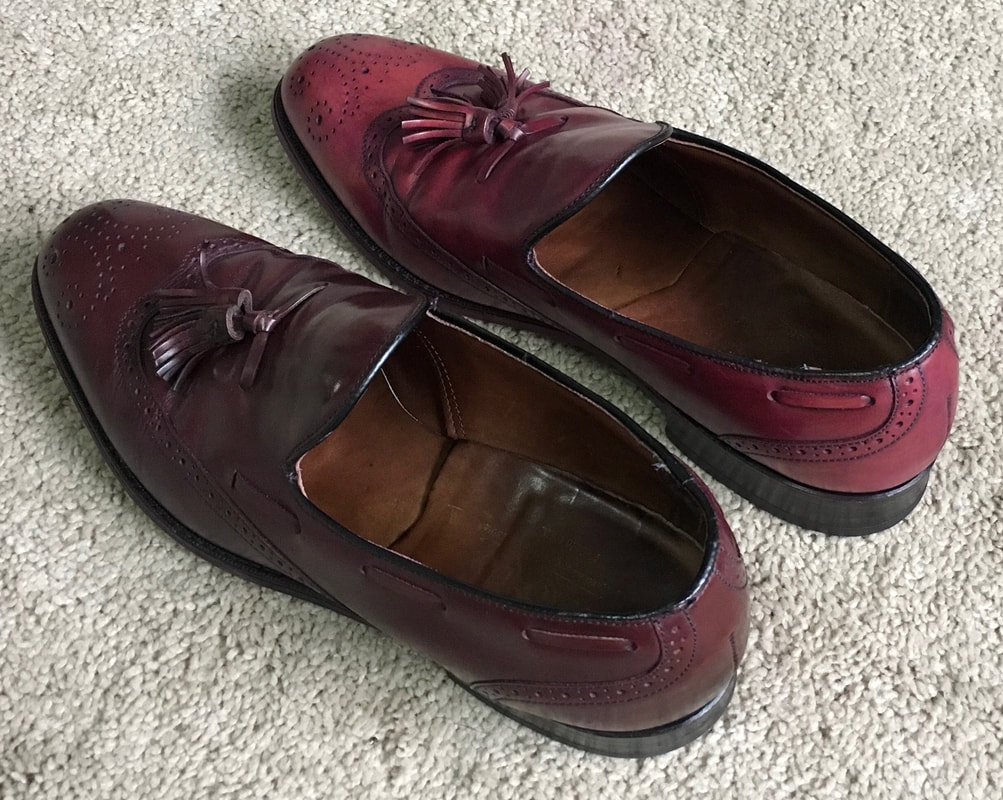
I've been told that any time you colour a shoe with polish, it is to be considered temporary (a good, standard cleaning will remove the colour you added), but the dye I want to use (#62) is kind of expensive (on my budget - the linked amount is enough to do it once whereas the polish is a great many applications worth) and at this time not available on Amazon in the colour I want, so I elected to not dye this pair (at least not yet). The temporary nature of the polish meant that the toe is a little lighter than the rest of the shoe as a colour little came off when I waxed it - I think it still looks OK, but I'd recommend against a clear wax if this is undesirable to you.
So, for me at least, burgundy to purple was a little under $10 (the cost of the new polish), as I had some items on hand, but when I go Oxblood to purple, it'll cost a bit more (About $22.50 - I already have the polish now, so just the cost of the dye plus shipping).
So, for me at least, burgundy to purple was a little under $10 (the cost of the new polish), as I had some items on hand, but when I go Oxblood to purple, it'll cost a bit more (About $22.50 - I already have the polish now, so just the cost of the dye plus shipping).
Before & After
Next day update (posted a week later):
The new (to me) Allen Edmonds loafers arrived last night & after a good cleaning with just Saphir Revovateur and a polish with Saphir’s Lavender cream polish followed by a light waxing with Saphir’s neutral wax, I have concluded they are far too nice to subject to such a harsh procedure. Who would have guessed, based on the images provided by the seller - I’m grateful that so many of them don’t know how to prep their shoes prior to selling, as both pair (these and a black capped toe brogues that look like they have 90 days worth of light to normal use now that I have cleaned and polished them) I have gotten on eBay so far would have sold for far more. Sigh, I just ordered the dye, too ... as problems go, this is a pretty good one to have, I have a few dollars left in my shoe budget, so I started watching eBay for another shoe to dye.
Quick clean & polish, better pic eventually.
Two days later (Tuesday): I found a nice pair of whole cut medium brown bicycle toes in my size, so I placed a bid.
Thursday (still high bidder): I got an email stating the dye I ordered was not available from their distributor. Dang. Went back to Amazon (they were previously out, but I had nothing to lose) & huzzah! The seller on Amazon is back in stock (and cheaper, nice). They also carry Lincoln's purple, so I decided to spend my savings on a second colour. I haven’t read anything bad about Lincoln's dye, but I’ve read that the Saphir product is basically as good as it gets, so I’m anxious to compare them.
Friday: Shipping update, the dye should get here Monday. Nice :-)
Saturday: I should have watched the auction more closely, I was actually willing to increase my bid by $4, but the auction ended $1.49 over my bid. Ce est la vie. Looks like we’re going forward with the Bostonians. I now have a couple hours of difficult cleaning ahead of me today.
(A few hours later): I was right when I guessed a simple cleaning prior to stripping would save me some time: I reduced 3 hours to just over 2 hours & then re-cleaned the first shoe to have them prepared to accept the dye. And, yes, I used a glove this time (I cut the fingers off and just used them one at a time on the finger or thumb doing the work - even with rag, the gloves wore pretty thin, so I swapped them out before they split). :-)
After the stripping, I once again applied Saphir Renovateur to rehydrate the alcohol-parched leather and I started to remove the edge dressing on the soles with a razor blade, but I think I need to finish them off with some fine sandpaper tomorrow or maybe Monday.
I also prepped a small scrap piece of smooth tan leather (shout out to Tempe Sales in Tempe AZ - you never know what you’ll find in the scrap bins, but at $2/lb, it’s worth checking occasionally if you’re in the area). I first stripped it with the alcohol (I probably used 5-6oz to do both shoes, if you’re curious), applied Saphir Renovateur and then polished just 1/2 of the piece twice with the lavender, followed by a waxing - just as I did the shoe last week - and finally, I cleaned that side again. This is to simulate both shoes on one convenient piece of leather; I’ll be able to see in advance if last week’s shoe will accept the dye differently & if it does, act accordingly. I can also test both purples next to each other and on top of each other to see if I’ll be going multi-tonal - maybe even a dark to light purple patina, though that feels a little ambitious.
Sunday: I picked up a brush from an artist friend, I told him my criteria was nicer than I can get a dozen for a buck at the dollar store, but nothing so nice he’ll be upset if I ruin it (never used alcohol-based dye before, not sure what to expect). I should be ready to go tomorrow after work.


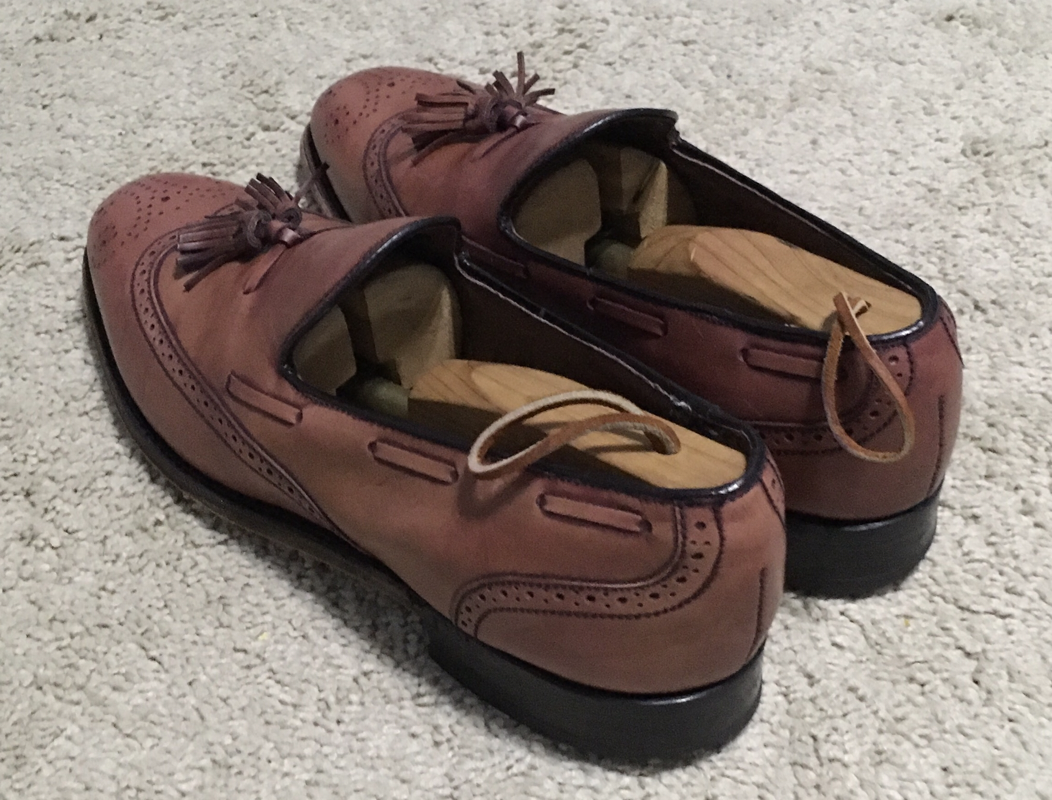

Tuesday: More about the process later, but for now I'll state that it took longer last night than I had guessed (a few hours, in part because I'm a little OCD) and that while they aren't perfect, I'm happy enough with the results. I also used a LOT less dye than I thought, doing 2-5 coats (depending on what part of the shoe). You'll notice I did the edge dressing too ... not 100% sure how I feel about it, so I may redo that part black.
Both the Saphir and Lincoln dyes were nice to work with; I wouldn't say one was any easier or had better coverage than the other & since they were both alcohol-based, I blended them for all but the warmer section below. Because of the price difference, if I needed to buy it again, I'd probably buy just Lincoln, in Oxblood & Purple & do all my own blending (save $5 & have 33% more dye).
Both the Saphir and Lincoln dyes were nice to work with; I wouldn't say one was any easier or had better coverage than the other & since they were both alcohol-based, I blended them for all but the warmer section below. Because of the price difference, if I needed to buy it again, I'd probably buy just Lincoln, in Oxblood & Purple & do all my own blending (save $5 & have 33% more dye).
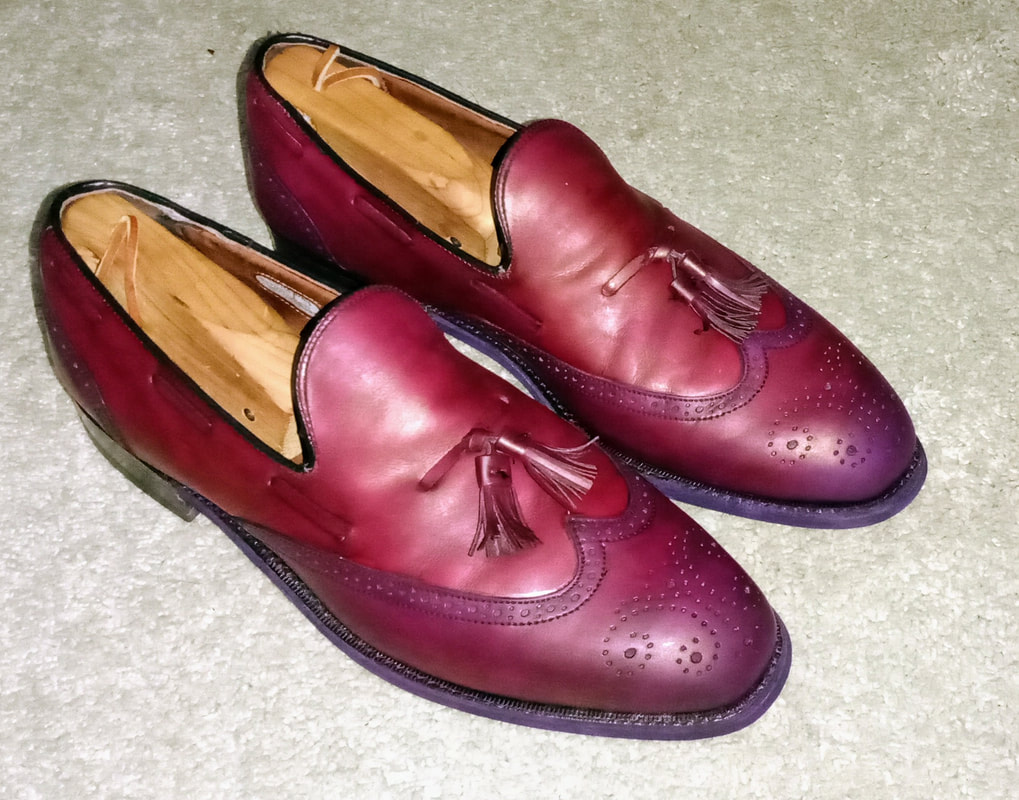
Post-dye, before reapplying Saphir Renovateur or polish/wax.
They'll certainly do, but I'm glad I did it first on a 'lesser' shoe:
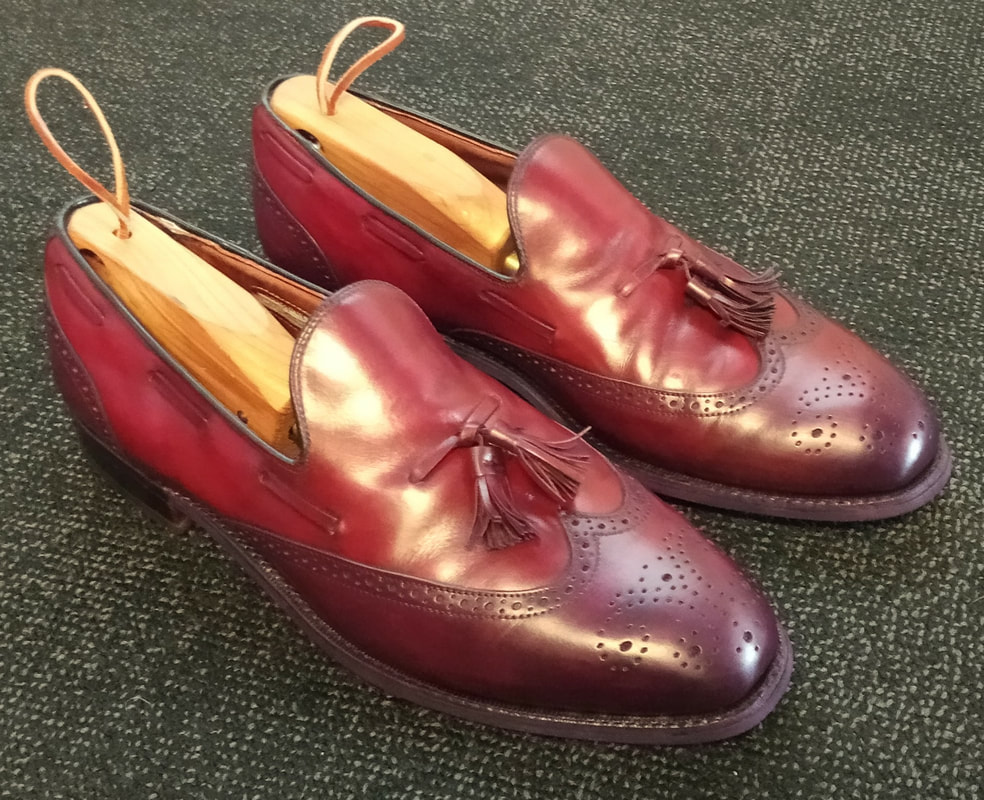
Hydrated, polished & waxed.
I only have the one photo of them dyed-not-yet-polished, but I'll take more of them polished - especially close-ups of how I did the brogueing (subtle, but I gave them a little character) and you might not be able to discern the patina in the above photo, but it's more visible in person (I'll try to capture it).
Thank for reading!
If you want to comment or ask a question, you can email me; take my domain name of jazzlad.com, remove the .com and add @gmail.com (sorry for the obfuscation, blame the spammers that automatically harvest email addresses from webpages).
If you want to comment or ask a question, you can email me; take my domain name of jazzlad.com, remove the .com and add @gmail.com (sorry for the obfuscation, blame the spammers that automatically harvest email addresses from webpages).